Whiteboard in Zoom
The Whiteboard in Zoom allows instructors to use a virtual whiteboard to share what is traditionally shared with students in the physical classroom. Additionally, it provides a place for students to collaborate with one another in real-time before, during, and after class via the Zoom tab in Canvas.
Zoom has a whiteboard application built into it. Select the Share Screen option and then select Whiteboard.
The top of the whiteboard provides a menu with all of the annotating features available. This menu is also where you access the Save button, which will export the whiteboard as an image onto your computer. The Clear button also provides multiple options, including Clear All Drawings, Clear My Drawings, or Clear Viewers’ Drawings.
Allow Students to Draw on the Whiteboard
Collaborating with participants is possible within the whiteboard if enabled. To enable:
Log into your Zoom account at https://zoom.usu.edu
Click on the Settings link on the left-hand navigation
Under the In Meeting settings, find the Annotation option and toggle it on
Also, toggle on the Whiteboard option

While you are in a meeting and sharing the whiteboard, hover over the top of your screen until a taskbar appears. Select the More menu and select Enable Annotation for Others. You can also choose to Show or Hide Names of Annotators, which will add a marker with the participant’s name wherever they make annotations.

Whiteboard via Canvas
Whiteboard AI Created Categories
The Zoom Whiteboard has a built-in AI that can assist in creating prompts for group work based on a specific topic. This allows you, as the instructor, more time to focus on other important aspects of class while allowing the AI to help in facilitating group work.
To use this feature:
Log into your Canvas account at https://usu.instructure.com/
Click on the Zoom tab in the left-hand navigation menu
To the right of the Zoom logo, select Whiteboard

Click on New in the upper right-hand corner
From here, you can either select a template or click x to start a blank board.
On the left-side toolbar, click the AI tool to create categories

Select Continue to begin the AI process
Fill in the necessary information to help the AI before proceeding.
If the AI-built sticky note categories suffice, simply select the checkmark to confirm
Once confirmed, you are able to click and drag the items to distance them from one another. This allows for students to have an easier time collaborating without running into another group's work.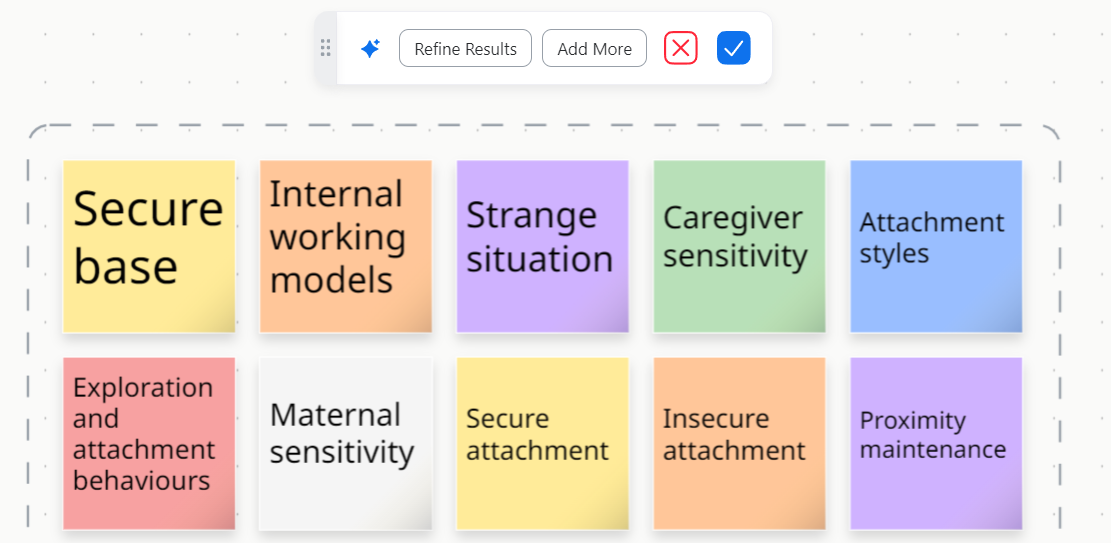
Since students view and interact with the whiteboard this tool allows student groups to work together quickly and in one space. By creating sticky notes, through AI or manually, students are able to add on to their specific topics, draw, write, etc. To add to specific topics to existing sticky notes, the students will simply need to hover over the desired sticky note and select one of the dots to create a linked sticky note as shown below.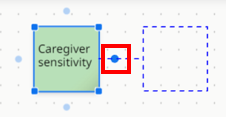
Voting in Whiteboard
Another collaboration tool offered through the Whiteboard application is real-time voting. This option allows the class to vote on individual parts of the material in the Whiteboard feature of Zoom and allows students from distance sites to experience more easily accessible in-class collaboration.
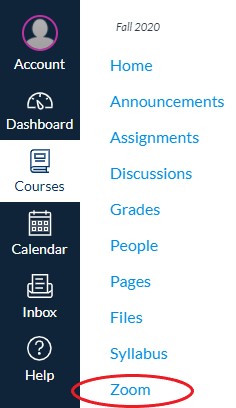
Log into your Canvas account at https://usu.instructure.com/
Click on the Zoom tab in the left-hand navigation menu
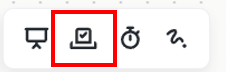
To the right of the Zoom logo, select Whiteboard
Once there is content on your whiteboard, select the Voting icon on the upper menu (by the title of the whiteboard)
Click on Create voting session and select which items you would like your students to vote on before starting the voting process
You are able to set the voting parameters on the left side of your screen. To add the options you want voted on, look at the material shown on the right of the screen and select those you desire to include in the voting session. (Note: The material selected will show a orange square in the upper right-hand corner of the "sticky note." Before starting your voting process, please check to see if all your desired options are selected.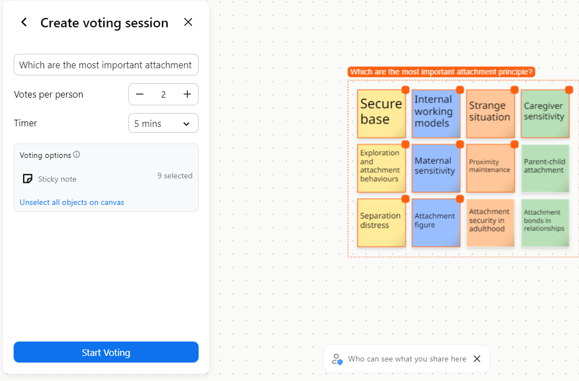
Select Start Voting once ready. If you set a time limit, you can wait for the time to be up or end it early by clicking End for all
In the left-hand side of the screen, there will be a countdown (if a timer was added), as well as letting you know how many people still need to vote. Furthermore, each student can look to the left to see how many votes they have left to contribute. To vote, students simply select the plus sign in the upper-right corner of the item.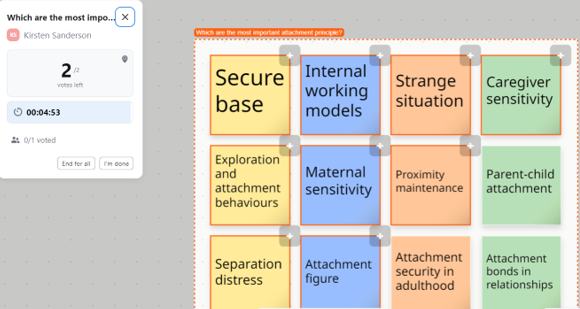
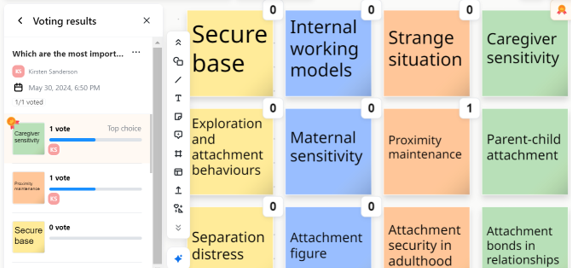
Once the voting has ended, the results will appear in a quick summary
The left side of the screen will give a breakdown of the votes displaying the votes in order of popularity. The right side of the screen will display all options with the number of votes they received and a ribbon is given to the top choice.
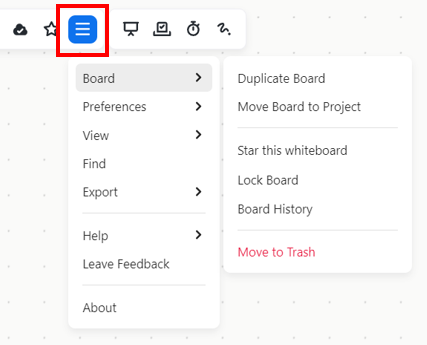
Additional Whiteboard Options
If you only want students to have access to interact with the board for a certain amount of time, or you don't want them to edit the board, you will want to lock your board. To do this, go to the menu option (icon with three lines), select board, then lock the board. The menu is also where you can view who has edited the board, export the board, etc.