Create a Page Template with Design Tools
Design Tools can help you create a basic page template for you to duplicate throughout your course to have a consistent look and feel. Below are the basic steps in selecting a pre-prepared theme and further customizing it to your liking.
Adding a Pre-Prepared Theme
Design Tools has pre-prepared themes that make it quick and simple to have a well-organized and aesthetic page. Below are the steps to access and apply these themes to your course pages:
Go to Pages in Canvas

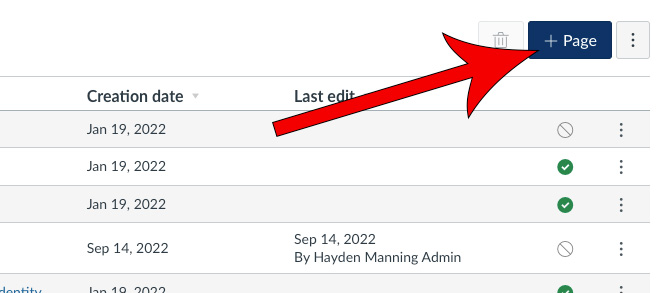
Click + Page

Give the page a title
Click on the rocket ship icon in the top right corner of the screen

Expand the Create/Edit Content dropdown

Expand the Choose a Theme dropdown and select a theme

Add, Remove, or Rearrange Sections
The theme that you selected may have more or less sections than are applicable to how your are conducting your course. You can easily adjust this within the Design Tools by doing the following:
Expand the Create/Edit Content dropdown

Expand the Add/Rearrange Content Blocks dropdown

Edit the theme to your liking
- To add a section, click + Add Blocks and select a desired section. You may also duplicate a section that you like by clicking on the icon.
- To delete a section, simply click on the X to the right of the section.
- To rearrange a section, click and drag the icon to the desired position.

Customize Your Template
Design Tools allows you to further customize the colors, images, and icons of the template page that you have created to make it yours. To accomodate for a variety of audiences with differing comfort levels of using the tool, Design Tools has a setting that will enable and disable certain tools to help their users avoid confusion. To customize your template page even further, we suggest that you change the following settings so that you have access to all of the necessary features to perform the suggested customizations.
Click on the Design Tools Settings icon

Select Intermediate for your comfort level
This may or not already be selected.

Add/Edit Icons
The following steps occur within Design Tools, if you don't already have it open, click on the rocket ship icon in the top right corner of the window.
Note: If you don't have access to the menu options, see Customize Your Template to enable them.
Expand the Create/Edit Content dropdown

Expand the Add/Rearrange Content Blocks dropdown

Click on the light grey square to the left of the content block name
This may or not already have an icon inside of it.
![]()
Search for and select a desired icon
![]()
To Add an Icon in the Banner or Header:
Expand the Add Advanced Elements dropdown and select Icons
![]()
Place your cursor where you would like to place the icon
![]()
Click Insert Icon at Cursor
![]()
Edit Colors
The following steps explain how to change the colors of the theme. If you don't already have Design Tools open, you can do so by clicking on the rocket ship in the top right corner of the edit screen.
Note: If you don't have access to the menu options, see Customize Your Template to enable them.
Expand the Customize the Style dropdown and select Colors for Banner Theme

Select the desired color square and adjust it to your liking
To see which section you are adjusting, you can hover over or click on the eye icon next to the name of the row. For more information on this section, you can click on the Colors for Banner Theme Help link found directly underneath the Content Title row.


