Add a Banner Image Using DesignPLUS
Banner images, especially on the home page of your course, help students immediately identify the course they are in. University-branded banners have been preloaded into the DesignPLUS sidebar. You can also create and upload a custom course banner.
Banner images can be any ratio or size, but a 10:3 ratio (1100 pixel width and 330 pixel height) is recommended. This ratio will look best with most DesignPLUS theme styles. Also, 1100 pixels is the default maximum width for content styled with DesignPLUS, so images with much larger resolution will be scaled down and would result in unnecessary page loading time.
There are three ways to add a banner image to a page:
- Use the Theme tool
- Use the Image tool
- Use the Upload/Embed Image tool
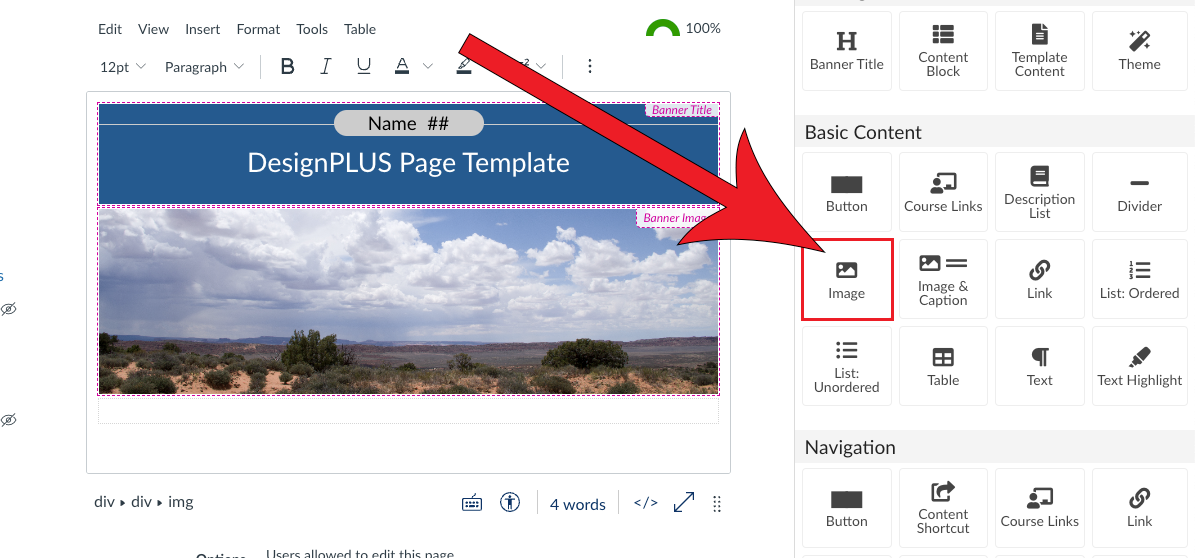
Theme Tool Method
Adding a banner image through the Theme Tool is the most common method used. In addition to adding a banner image, the theme tool will add a stylized page header that can also be customized.
Adding a Banner Image
The first step of getting your banner image onto a page is by adding the theme and curating a banner image placeholder to replace.
Navigate to Pages

Click + Page
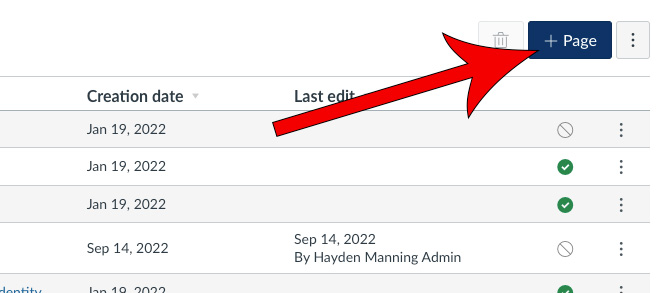
Give the page a title
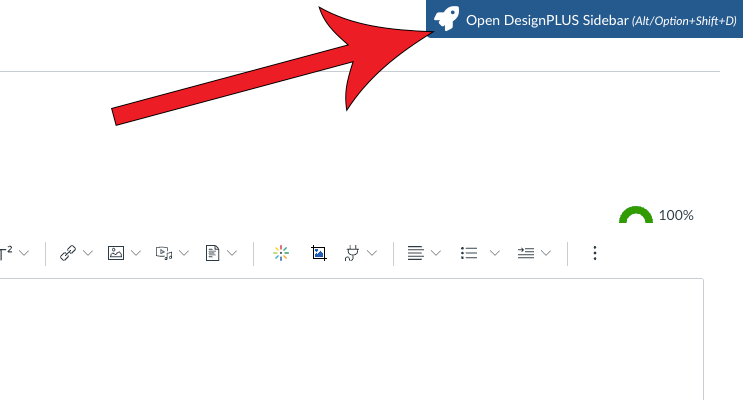
Launch DesignPLUS by clicking on the rocket ship icon in the top-right corner
If you haven't already done so, update the Legacy Design Tools sidebar to the DesignPLUS sidebar.
Click the Add New Elements tab if not already selected
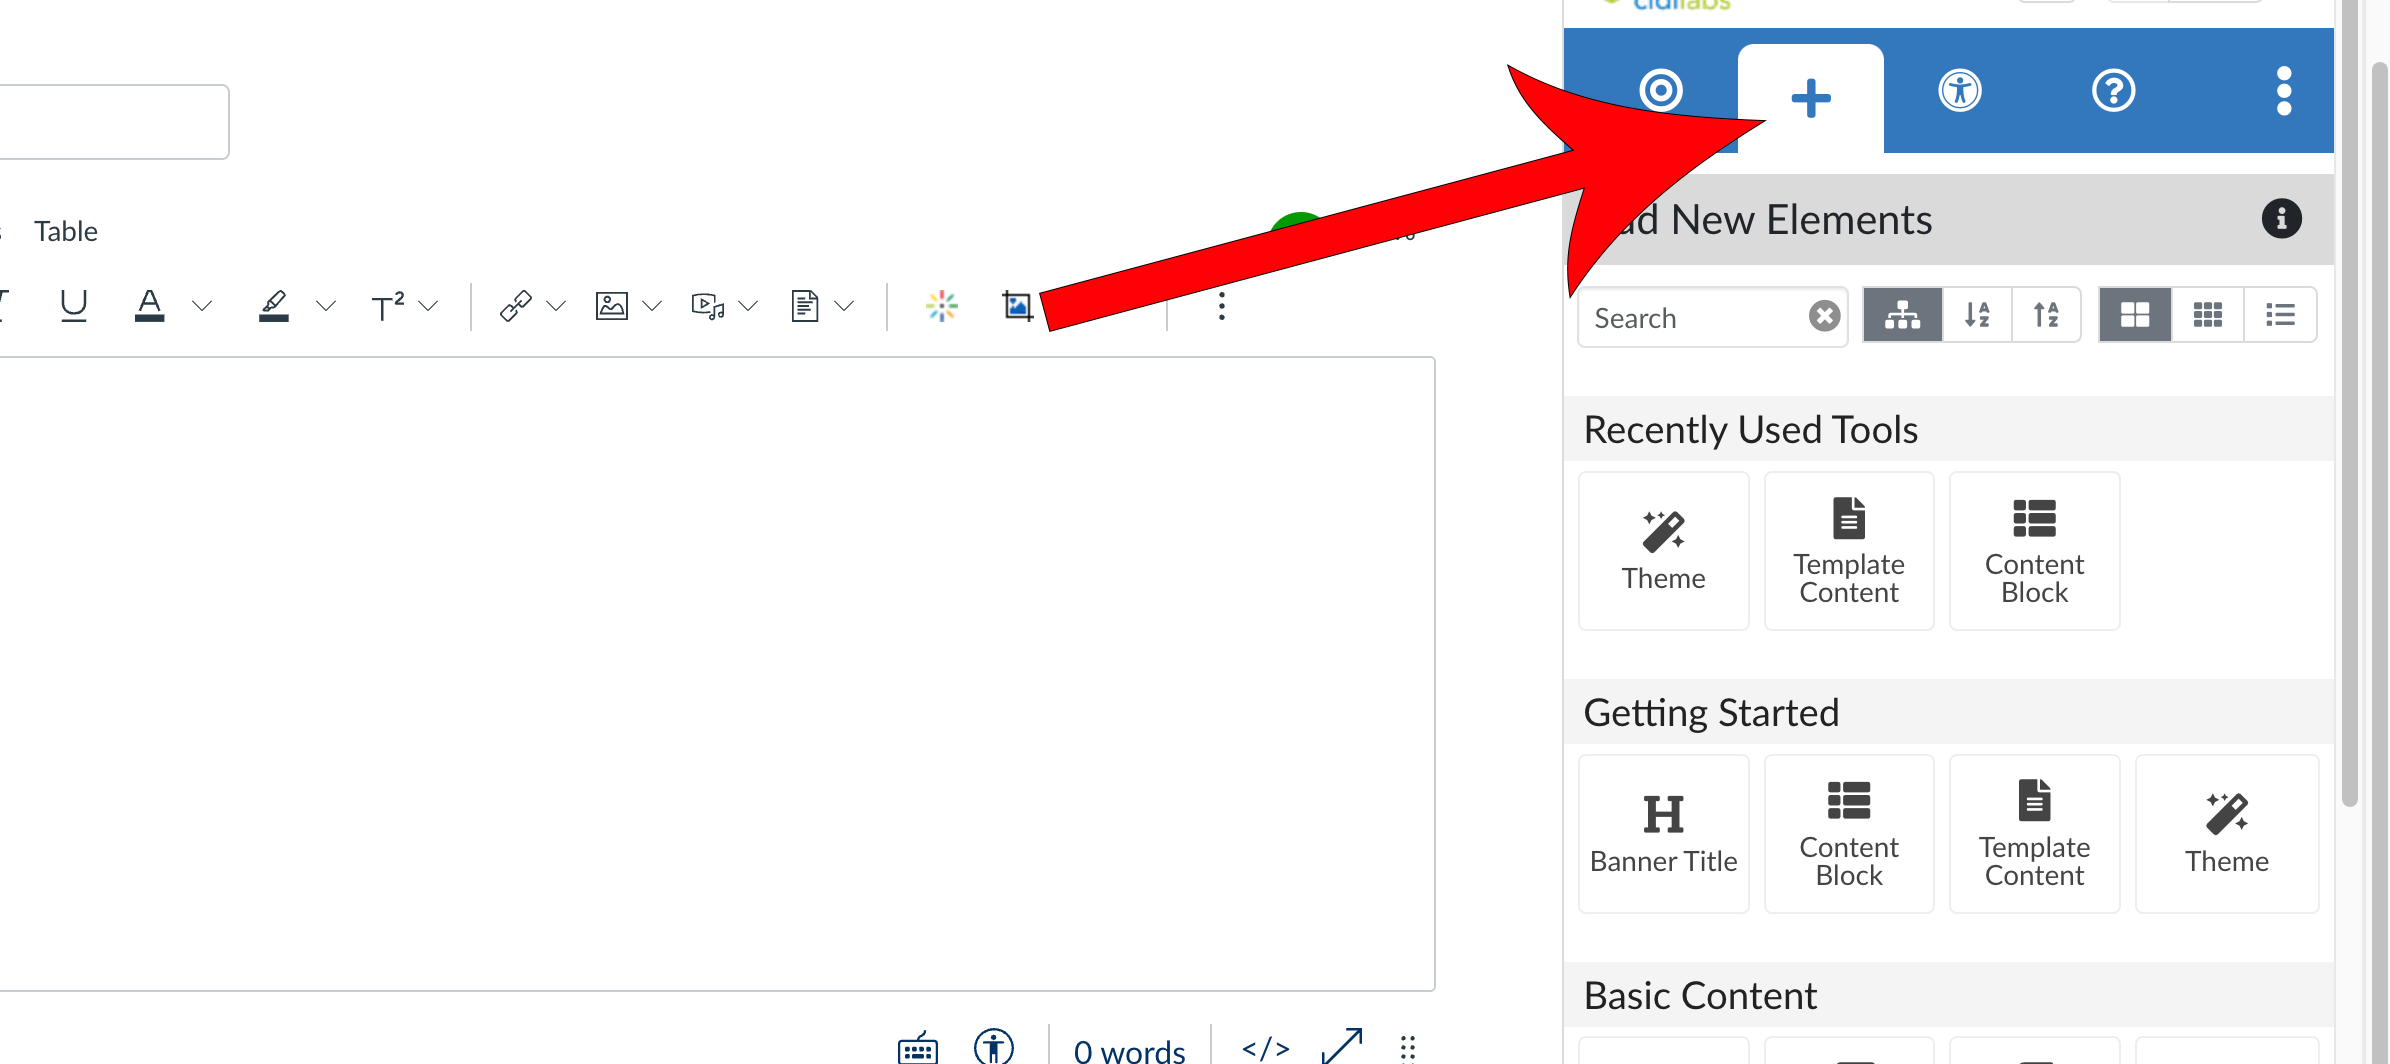
Select Theme from the Getting Started panel
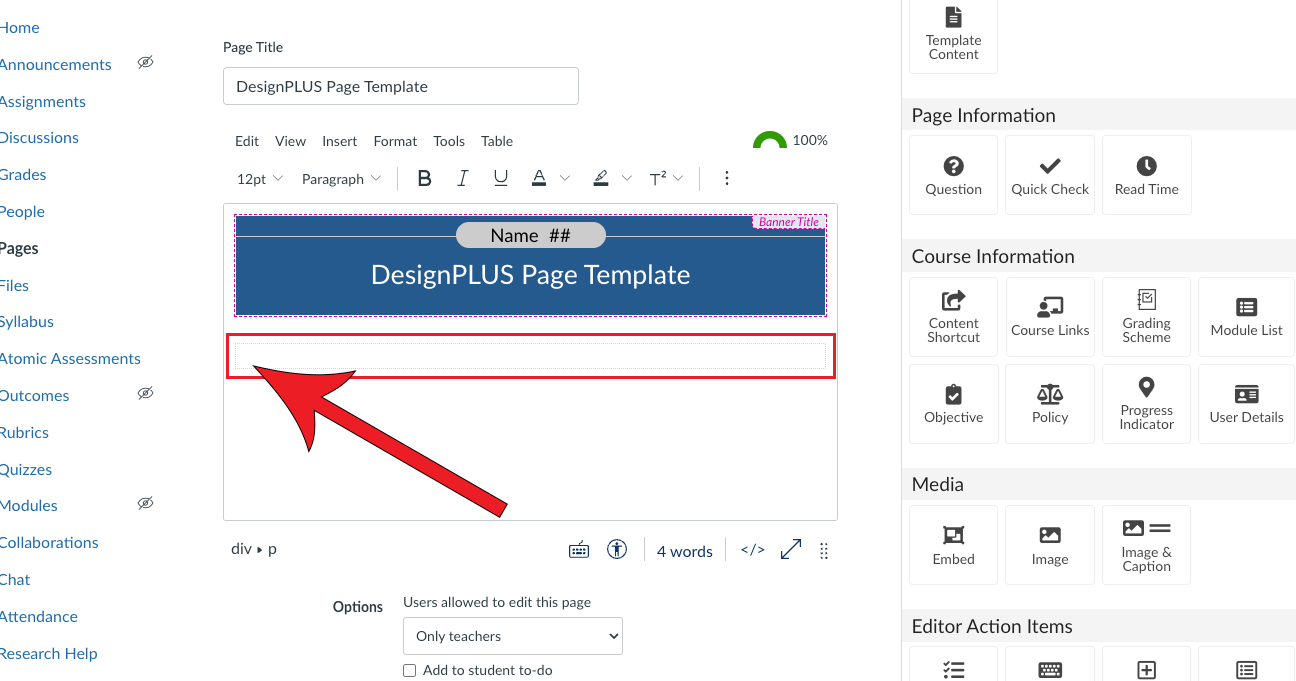
Selecting Theme automatically inserts a Banner Title with the default theme in the Rich Content Editor.

Click the + next to "Banner Image" from the Content panel

Replacing the Banner Image
Now that you have successfully added the default banner image to your page, you can replace the image to better match the style of your course. While editing the page and with the DesignPLUS sidebar opened:
Select the banner image in the content editor

Click the Edit Current Element tab if not already selected and make sure Image is the active tool

Select the image source where your banner image is located
You may have to click the up arrow next to Change Image to expand the image options. You can choose from:
- User images: Select the image to upload and embed the image in your Canvas page. If you are choosing a banner image file from a course other than the current course, you will be prompted to import the file into the current course. Select the destination and click "Copy to Course". This will import the file and update the image source path in the RCE, so it is viewable by anyone in the course.
- Course images: Once you find your image from the course files, select it and the image placeholder will update with the image path to the original image.
- Primary images: Select the "Banner Images Page" option from the Folders/Filters dropdown and select the banner image. The image placeholder will update with your publicly viewable image.

Add Alt Text or enable the Decorative setting
Alternative text provides information for an image if a user for some reason cannot view it (because of slow connection, an error in the src attribute, or if the user uses a screen reader).

(Optional) Click on Add Link to add a link to the image
Doing so will load the Link tool so that you can update the URL.

(Optional) Use the Style panel to further customize the banner
Through the style panel you can adjust the dimensions of the image, float the image around text, and adjust an image's maximum width settings.

Click Save

Image Tool Method
Another method to adding a banner image is through the Image Tool. This tool gives you a bit more flexibility as to where you want to place the banner.
Adding an Image
When you add an image using the Image tool, it will first input an empty placeholder image that you can then go in and replace. To add the empty placeholder image:
Navigate to Pages
Click + Page
Give the page a title
Launch DesignPLUS by clicking on the rocket ship icon in the top-right corner
If you haven't already done so, update the Legacy Design Tools sidebar to the DesignPLUS sidebar.
Place your cursor in the editor where you want the banner to go
Click on the Add New Elements tab if not already selected
Selecting Theme automatically inserts a Banner Title with the default theme in the Rich Content Editor.
Select Image from the Basic Content panel
Replacing the Placeholder Image
Once you have successfully added the image to the content editor, you can customize the image by replacing it with one that better matches your course content. In the page editor and with the DesignPLUS sidebar open, select the image and do the following:
Click the Edit Current Element tab if not already selected
Select the source where your banner image is located
You may have to click the up arrow next to Change Image to expand the image options. You can choose from:
- User images: Select the image to upload and embed the image in your Canvas page. If you are choosing a banner image file from a course other than the current course, you will be prompted to import the file into the current course. Select the destination and click Copy to Course. This will import the file and update the image source path in the RCE, so it is viewable by anyone in the course.
- Course course images: Use the search field or Folders/Filters dropdown to locate the file. Once you find your image from the course files, select it and the image placeholder will update with the image path to the original image.
- Primary images: Select the Banner Images Page option from the Folders/Filters dropdown and select the banner image. The image placeholder will update with your publicly viewable image.
Add Alt Text or enable the Decorative setting
Alternative text provides information for an image if a user for some reason cannot view it (because of slow connection, an error in the src attribute, or if the user uses a screen reader). If the image is purely decorative and conveys no meaningful information, you can check the box next to Decorative for screen readers to ignore it.
(Optional) Click on Add Link to add a link to the image
(Optional) Use the Style panel to further customize the banner
Through the style panel you can adjust the dimensions of the image, float the image around text, and adjust an image's maximum width settings.
Click Save
Upload/Embed Image Tool Method
The Upload/Embed Image tool can crop any image to a banner image aspect ratio (recommended 10:3) from within the Canvas RCE. Simply launch the tool, select the image, crop, and the tool will upload and embed the image in your Canvas page.