Document Appointments (Check-in Queue Overview)
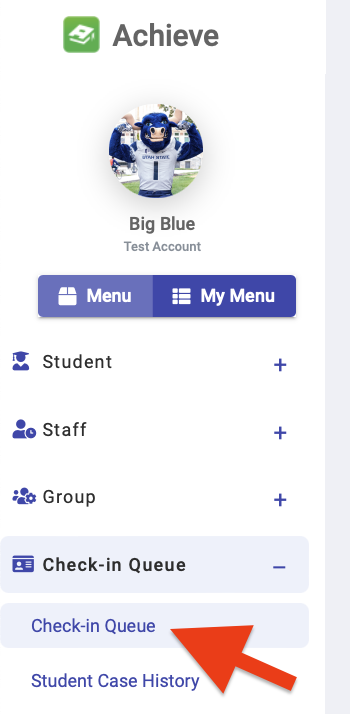
The Check-in Queue enables you to track and document appointments with students. This is accessed by going to the Check-in Queue tab.
Table of Contents
Checking In Students
Before documenting an advising session, the student needs to be checked into the queue. There are two ways to check in students for both pre-scheduled and drop-in advising appointments.
- Kiosk Check-in – Students check themselves in
- Manual Check-in – Advisors/Receptionist check the student in
Kiosk Check-in
When students arrive for their in-person advising appointment, they can check-in for their appointment at either a Kiosk computer or by scanning a QR code and completing the check-in on their device.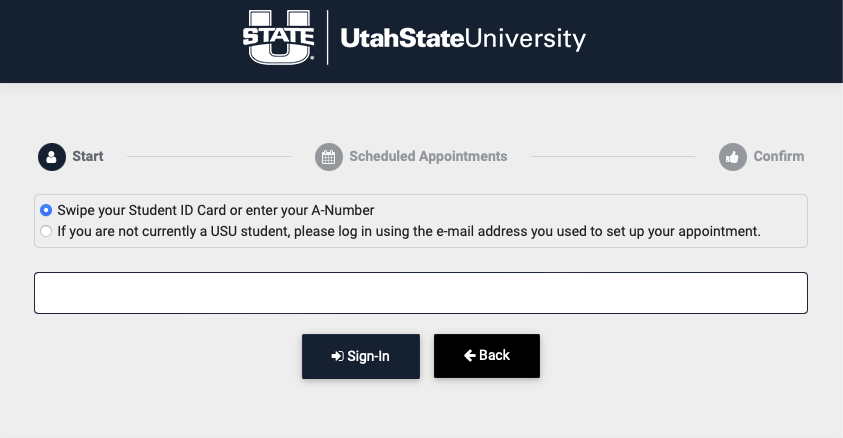
Once the student has checked in, they will be added to the Check-in Queue.
Kiosks can be configured to only allow students to check in for pre-scheduled appointments or to allow both pre-scheduled appointments and drop-in appointments. To set up and configure a kiosk, contact Sean Peterson.
Manual Check-in
Advisors and receptionists can manually check in a student for their appointment. This option is required for virtual appointments where a student does not show up in-person.
Navigate to the "Check-in Queue"
When a student arrives for their appointment, select "Today's Appointments"

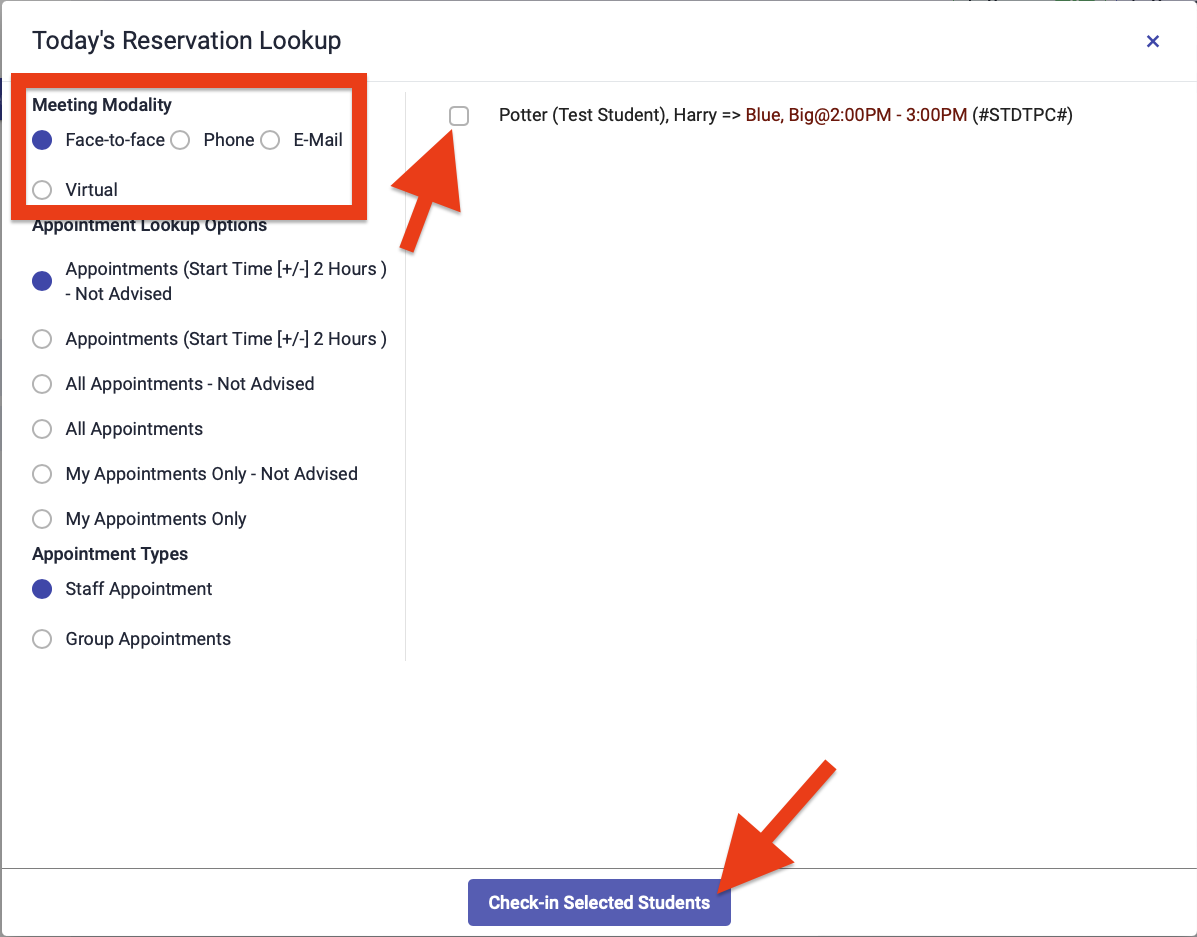
A window will open allowing you to see scheduled appointments for the day. By default, you'll see appointments scheduled for the next two hours. If needed, use the filter options to change the type of appointments that are displayed. Select the option that best works for you.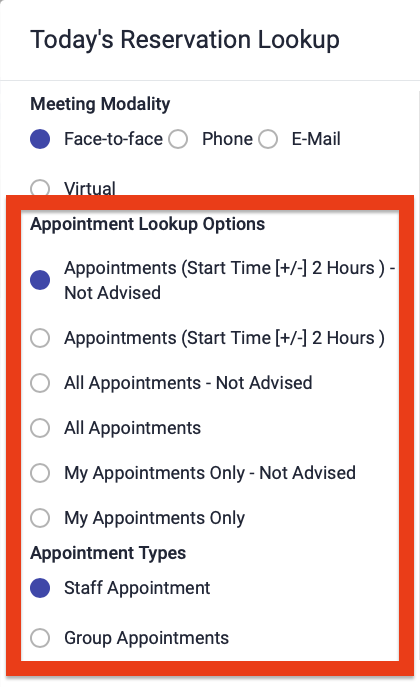
Select the radio button next to the student you want to check-in, select how you are meeting with them (Face-to-face, Phone, E-mail, Virtual), then select "Check-in Selected Student"
The student will then show up in the "Sign-In Queue." Each appointment type in the queue will be noted differently at the bottom of the card: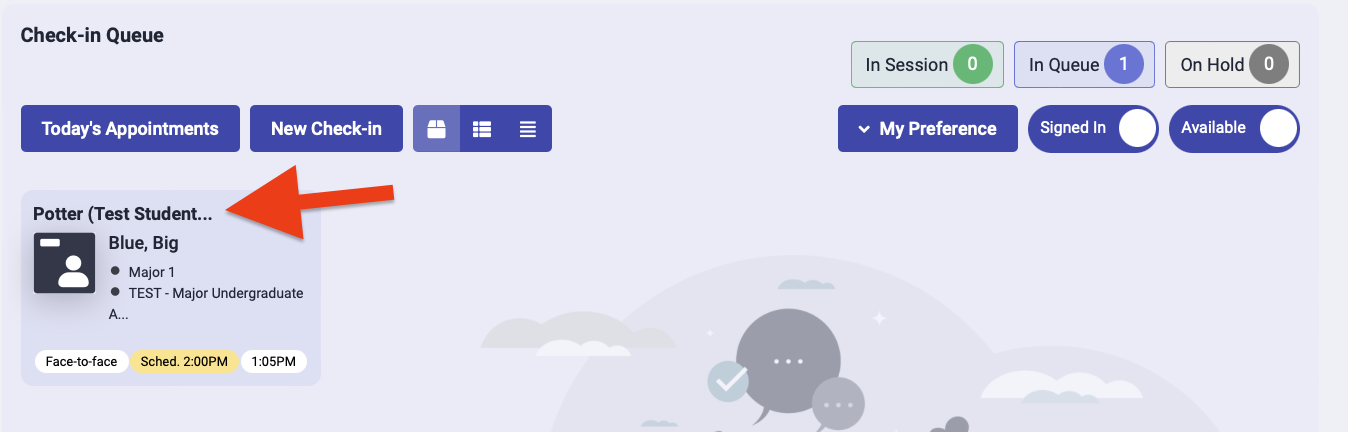
Documenting a Session
Once a student has been checked in, follow these steps to document the session in Achieve:
Start the session
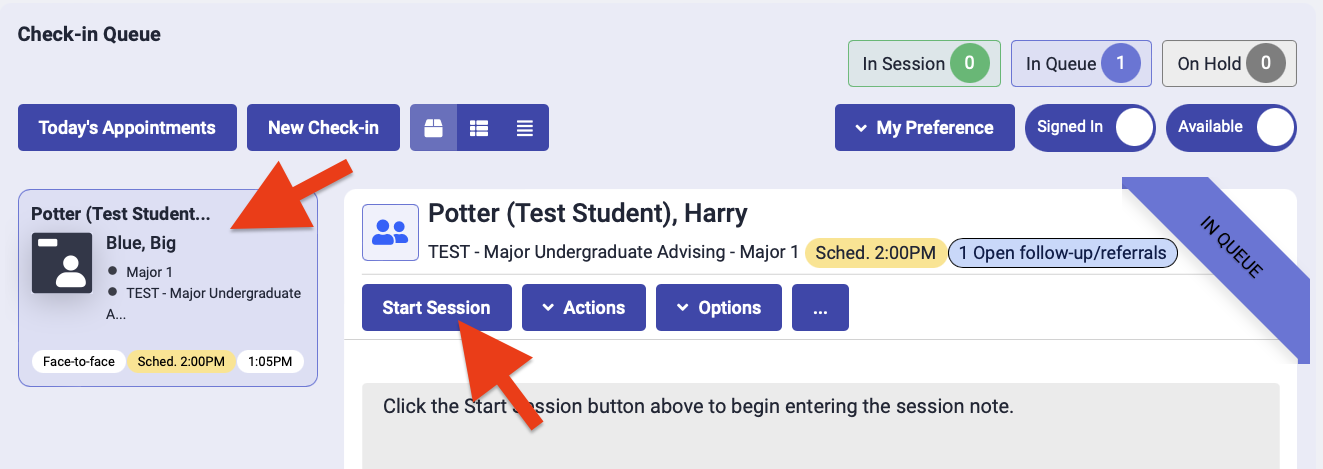
- Begin by selecting the name of a student in the Check-in Queue.
- Select the Start Session button.
Optional: Review the student's profile and other information
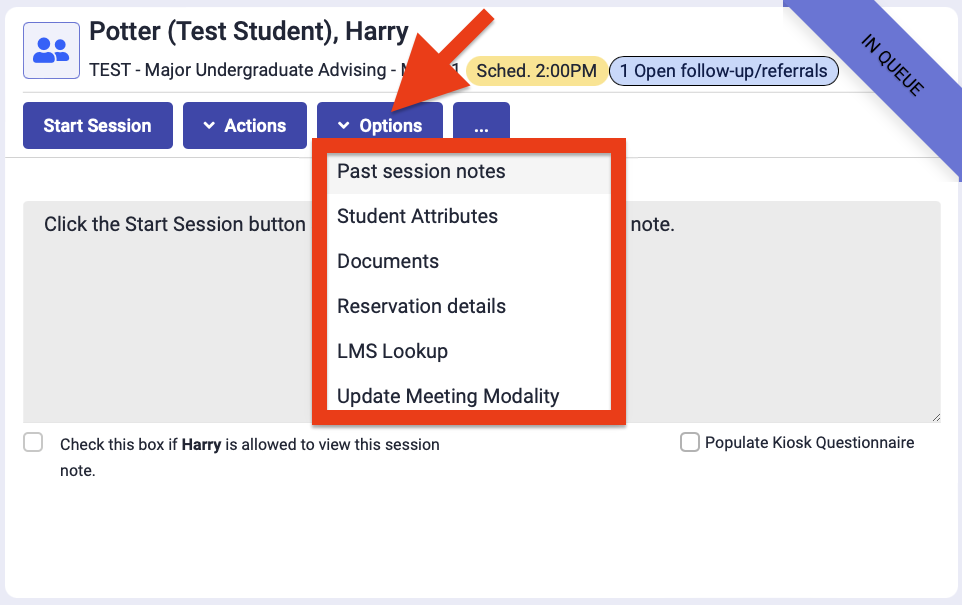
This information is available prior to or after starting a session.
- Past Session Notes: View past session notes recorded to the student's profile.
- Student Attributes: Access the student's profile to view Banner data for that student (e.g., primary major, primary minor, GPA, etc.)
- Reservation Details: View the questions that a student answered when they booked their appointment.
- LMS Lookup: View live data from the student's Canvas courses.
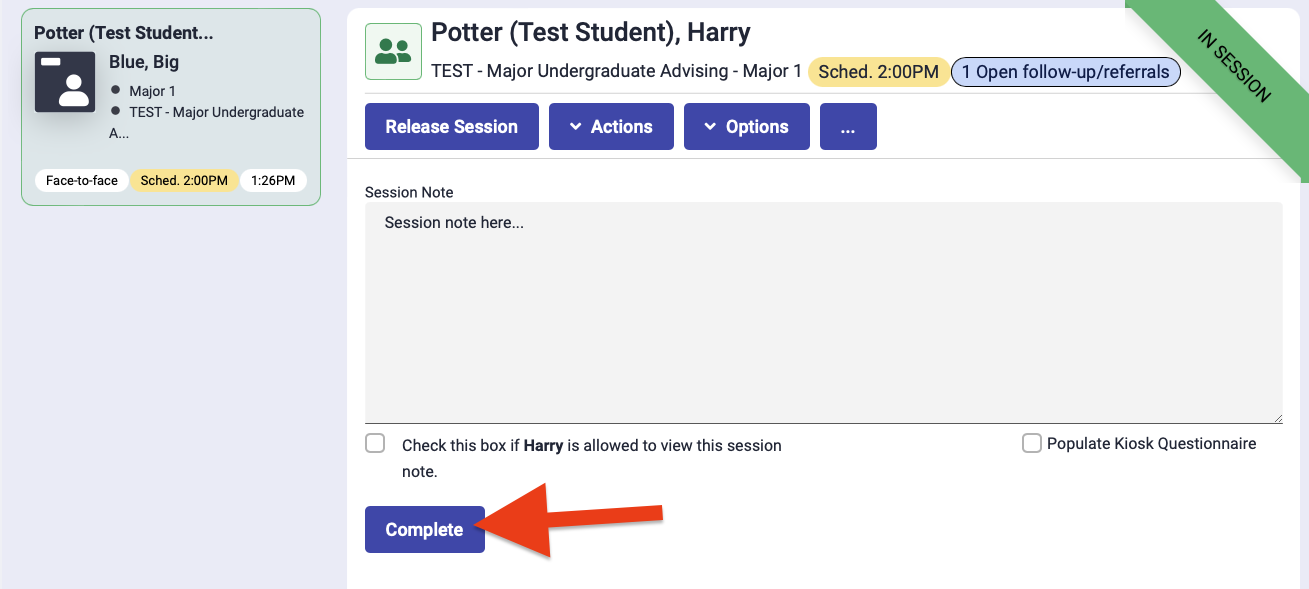
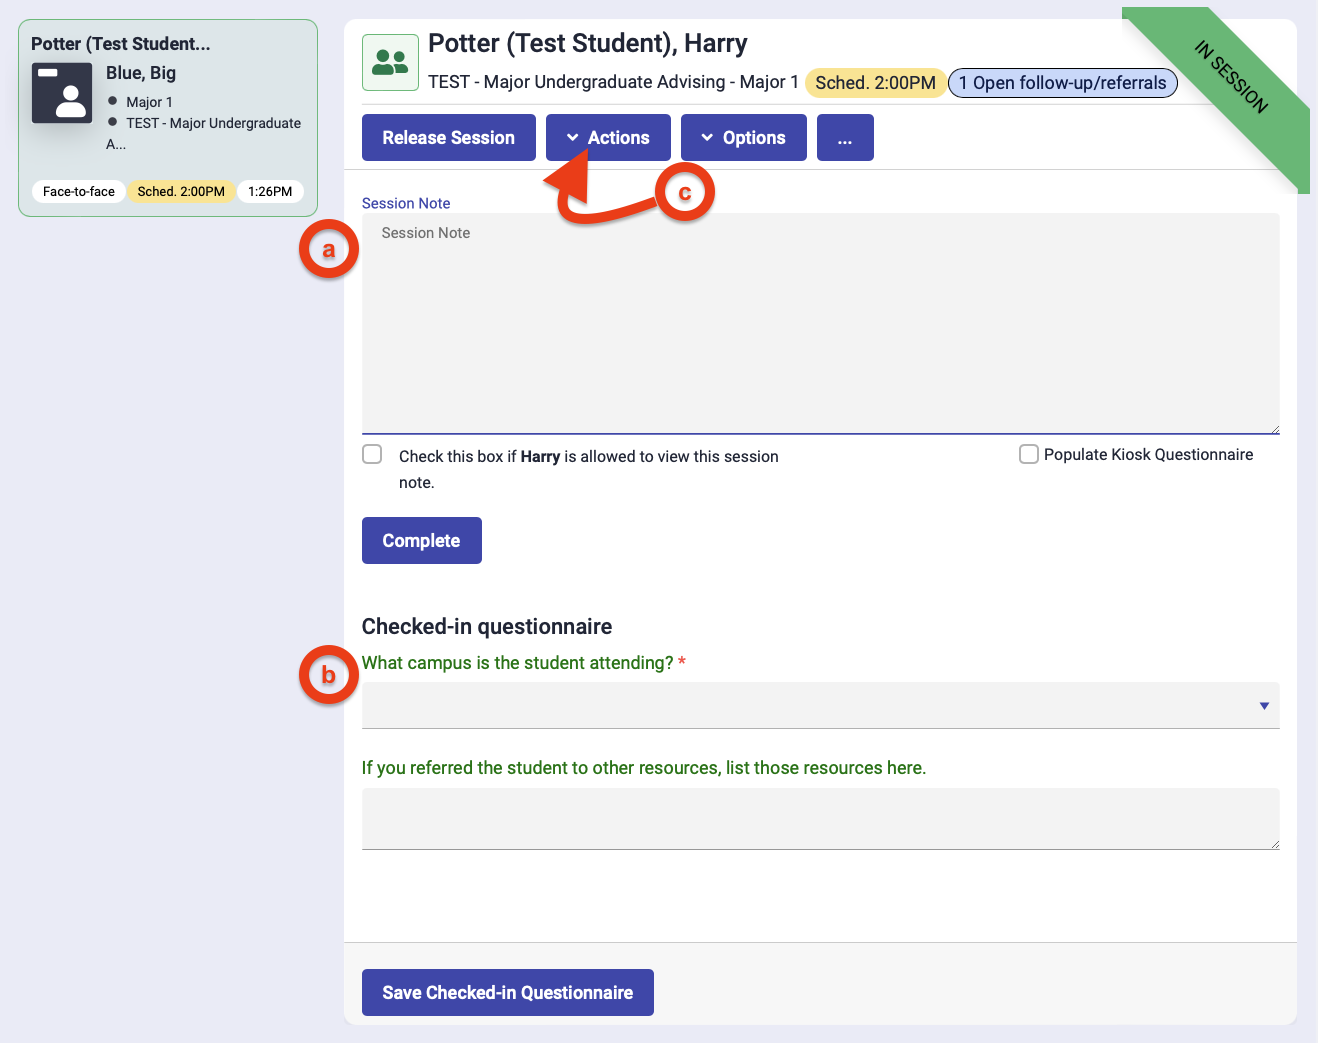
Document the session
These options are available to document/process an advising appointment:
- Session Note: This is a text field where you can add notes regarding the appointment. Notes will be saved to the student's profile and tied to the program the student made an appointment under. Notes are visible to all admins, achieve managers and advisors associated with the program type for the appointment.
- By selecing the checkbox "Note Visible to Student," the student will be able to see the advising note from their online Achieve profile.
- Appointment Questions: Questions can be displayed here for staff to answer during appointments.
- Save QA: This can be clicked to save answers to appointment questions without completing the advising appointment session. This may be used if a receptionist collects information from the student prior to the advisor meeting with the student.
- Create Follow-up/Referral (located under the Actions button): A follow-up/referral record can be created. The purpose of the follow-up, who should be following up, when the follow-up should happen, and notes can be added.
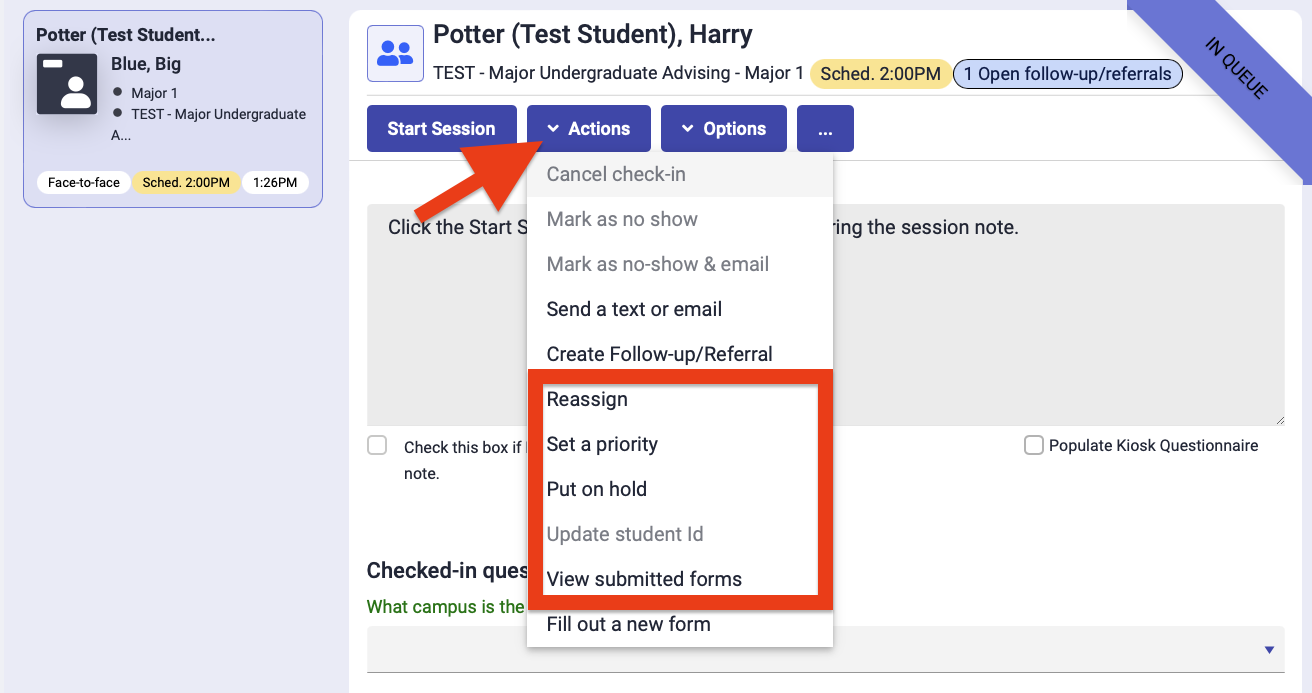
Appointment Processing
There are multiple ways an appointment can be processed in addition to providing advising. Accessing these functions by clicking the Actions button after a student has been selected from the queue.
- Reassign: Reassign a check-in to another advisor for processing. Choose the program and advisor to reasssign the student to.
- Priority: Inidicate the priority of the appointment. Options are Normal, Medium, and High.
- Put on hold: If a student needs to leave the waiting area momentarily (e.g., restroom break), the front-office can put the check-in on hold for a selected amount of time. This will make the check-in inactive for that amount of time which prevents advisors from selecting and starting a session with the student. After the selected amount of time has passed, the record becomes active again.
- Cancel check-in: Use this option if a student's check-in should be cancelled.The student must be selected and a sessions started before the "Cancel check-in" button can be selected.
- Mark as no show: Select this if a student doesn't show up for their appointment. The system can send an email to the student with a link to reschedule by selecting the Mark as no-show & email option. The session must be started before either of these buttons can be selected.
Complete the session and select an appointment reason.
The appointment reason options can be customized for each advising center. Note that only one reason can be selected.