Create Appointment Slots
Receptionists may need to create appointment slots on behalf of advisors in their office or show advisors how to create them. This guide goes over how to create appointment slots within Achieve and Outlook.
Table of Contents
Creating Appointment Slots
Creating Appointment Slots in Achieve
When creating appointment slots through Achieve, you can create appointment slots for more than one program as well as quickly create multiple appointment slots (e.g., six 20-minute appointment slots between 1:00 - 3:00 PM).
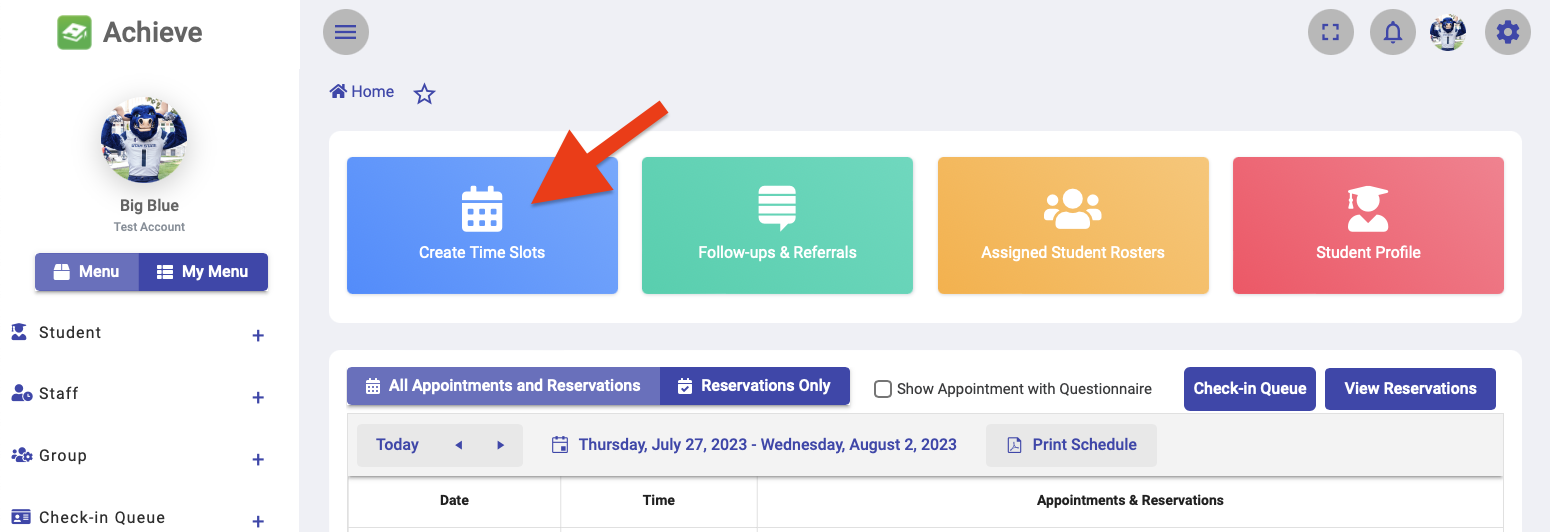
Select "Create Time Slots" from the Achieve Dashboard
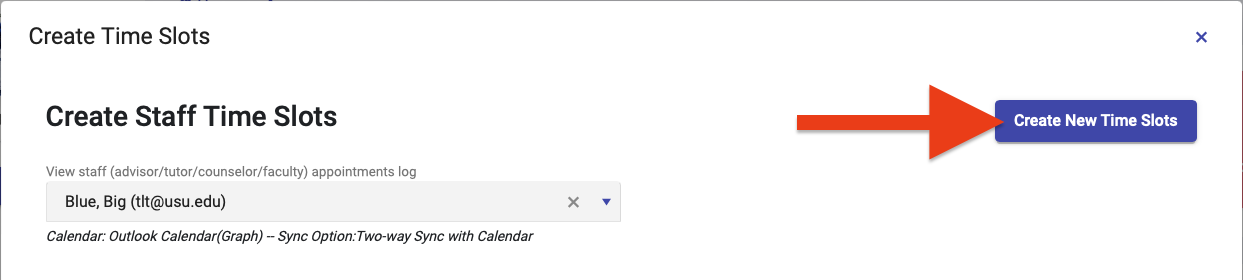
Select "Create New Time Slots"
Specify the Following:
- Department
- Program
- Staff
- Location: This will prepopulate once an advisor has been selected but can be overriden if needed.
- Subject: This will be displayed online next to the appointment time.
- Start and End times: of the appointment slot range
- Start Date and End Date: of the appointment slot range
- Appointment Block Type:
- Single Appointment Block: One appointment slot will be available during the specified time range.
- Multiple Appointment Block: Multiple appointment slots will be available during the specified time range. You can set the desired appointment duration of each appointment (e.g., 15 minutes, 20 minutes, etc.).
- Appointment Type:
- One-on-one: For appointments with one student.
- Multiple: For appointments with multiple students. You'll need to indicate how many students can schedule an appointment during the time.
- Walk-in: For offices using virtual check-ins / virtual centers.
- Schedule: Select the day(s) of the week that the appointment slot(s) should be added to.
- Include selected programs also in the same time slots: Select additional programs that should be included in the appointment slot.
- Notes to show with the appointment: Not configured for most units. When configured, these notes can appear in confirmation and reminder emails sent to the student booking the slot.
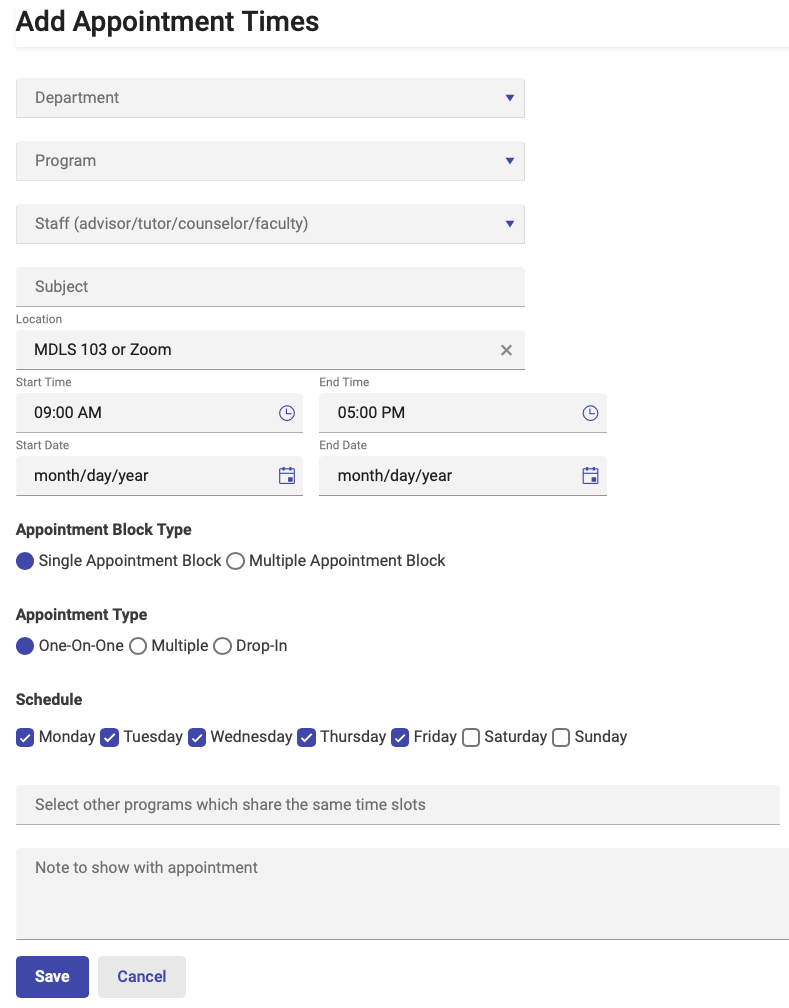
Click Save
If the advisor's account is set to sync both reserved and unreserved appointment slots with Outlook, the appointment slots will appear in their Outlook calendar. Learn more about calendar sync options.
Creating Appointment Slots in Outlook
To begin, you'll need the program code for each program the advisor advises. You can get these codes from your Achieve Manager.
Create an calendar event in Outlook
Open the advisor's Outlook Calendar and double click on the day/time you want to create a new appointment slot.
Enter the Program Code(s) (e.g., #CODE#) in the title/subject line of the calendar event
Appointment slots can be configured in multiple ways based upon the number of programs that can schedule during that time (single program or multiple programs) or by the number of individuals the advisor is willing to meet with at a time (one-on-one appointments or multiple student appointments) or if the block is for walk-in appointments. Below are examples of how program codes can be configured (the number at the end of the program code indicates how many students can schedule an appointment at that time).
- #ACCT# or #ACCT-1# (One-on-One Appointment - one program)
- #WORKSHOP-20# (Multiple Student Appointment (20 students) - one program)
- #ACCT-0# (Walk-In Appointment - one program, used for drop-in advising slots, Drop-in Advising must be configured in advance)
- #ACCT-0# #MATH-0# (Walk-in Appointment – multiple programs, Drop-in Advising must be configured in advance)
- #ACCT# #MATH# (One-on-One Appointment – multiple programs; if a student reserves one appointment, the other program code appointment is no longer available)
Add the appointment location (optional)
If the Location field is left blank, the advisor's default location defined in their Achieve profile will be used. You can override this by putting another location in the appointment “Location” field.
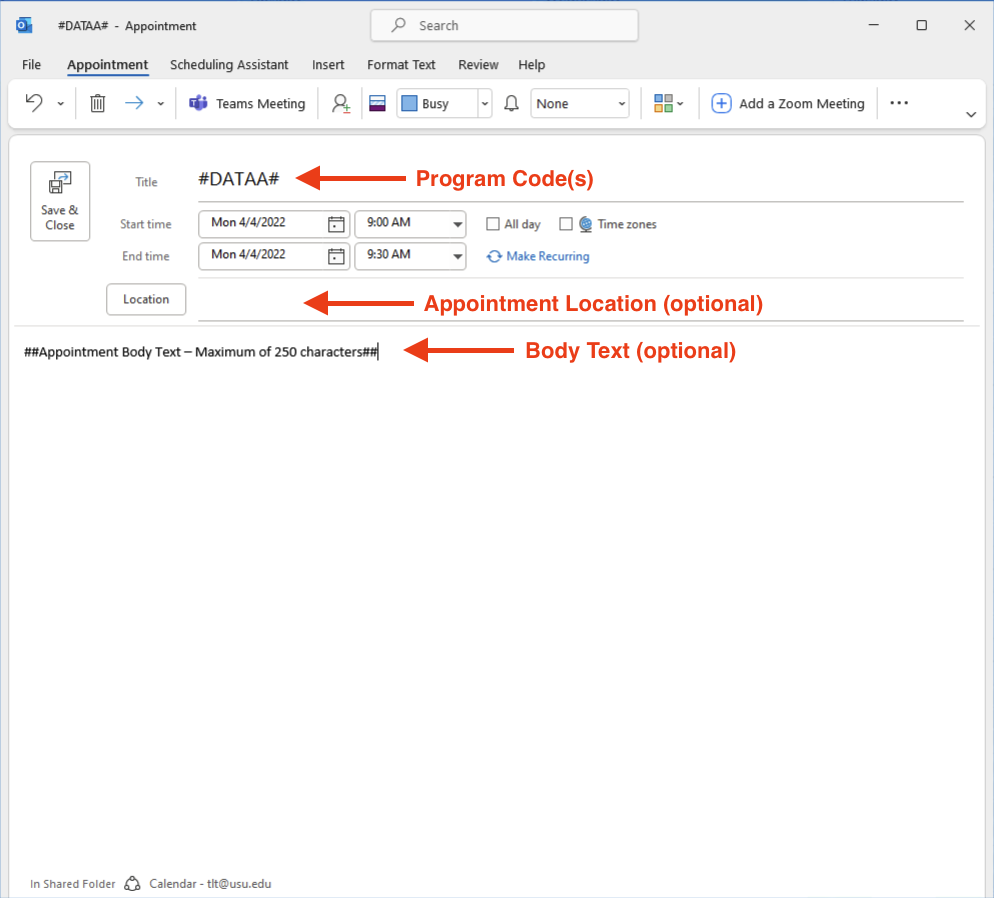
Body Text (optional)
When creating a new appointment, anything you enclose in ##Appointment Body Text – Maximum 250 characters## in the body of the appointment, will be viewable to the student making the appointment.
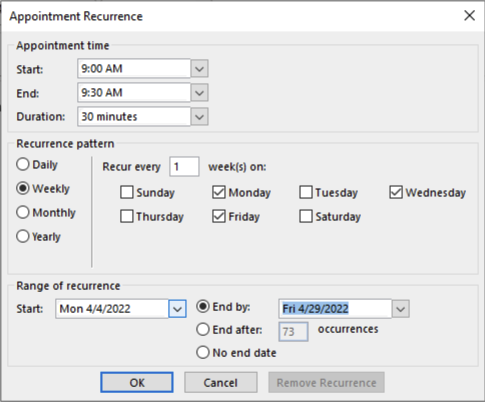
Reoccuring Appointments (optional)
The appointment time slot can be set to reoccur within Outlook. Specify a recurrence pattern and range then click OK.
Availability
You can set the event's availability as Free to indicate to others that the advisor is free during these times. When a student reserves an appointment slot, Achieve will change the availaibility status of that slot to Busy on the calendar.

Save and close the calendar event
The appointment slot(s) will sync with Achieve within 5 minutes.
Do's and Don'ts with Achieve Outlook Appointments
- Don't delete reserved appointment blocks through Outlook. Instead, cancel the appointment through Achieve.
- Don't delete/change the entire series of recurring appointments that have "reserved" time slots. Reserved appointments may be deleted/changed by mistake. If updates need to be made to a reoccuring appointment slot, you should review each individual appointment included in the reoccurence and update each one individually. For this reason, it's best not to recur a series too far into the future (i.e., indefinitely).
- Don't change the subject line or Time/Location of a reserved appointment
- It's okay to change/delete standalone or recurring appointment blocks that don't have reservations.