Group Appointment Attendance
Attendance to group events can be tracked in two ways:
- Using a kiosk that students swipe their student ID card through
- Manually in Achieve
This guide goes over both options along with how to record no-shows and export an attendance list. Use the table of contents to quickly jump to a certain topic.
Table of Contents
Kiosk Check-In
Manual Check-In
Post Appointment Options
Kiosk Check-In
Kiosk Set-up
To begin, configure the Kiosk Check-In Welcome Text and get the check-in URL by following these instructions:
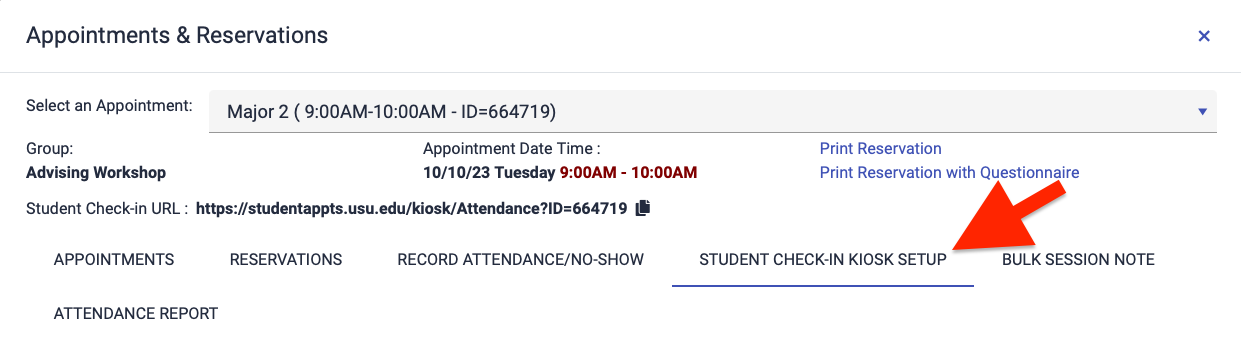
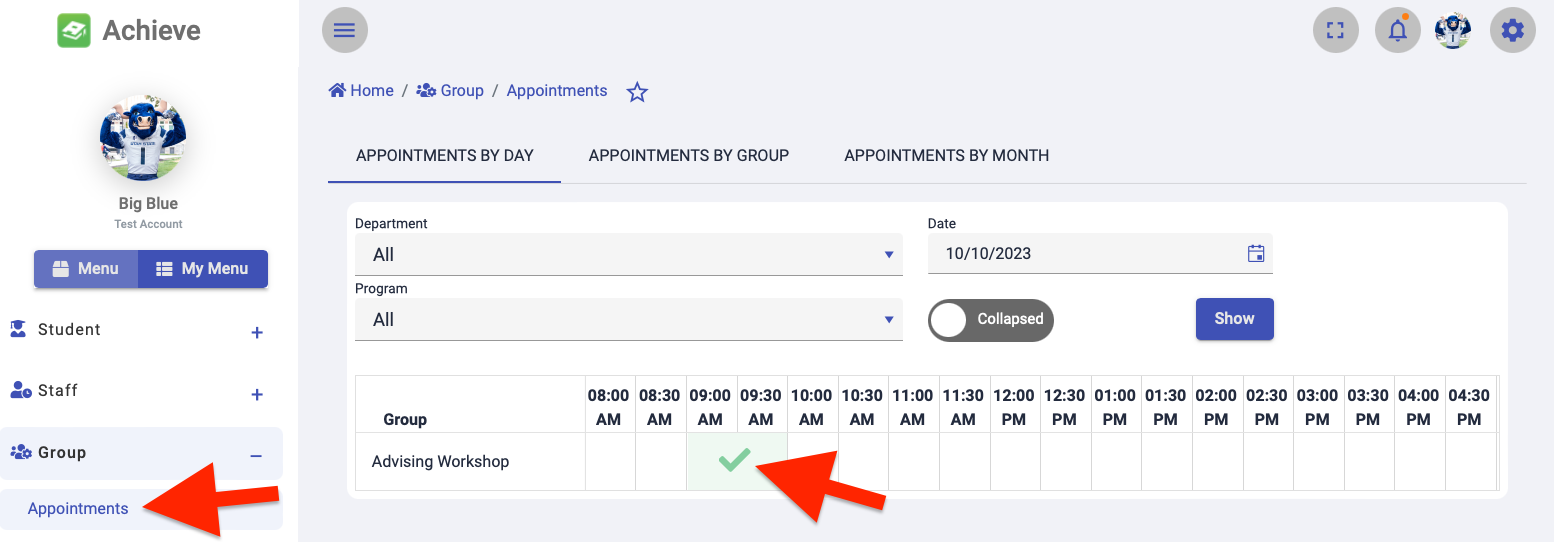
Under the Group tab, select "Appointments"
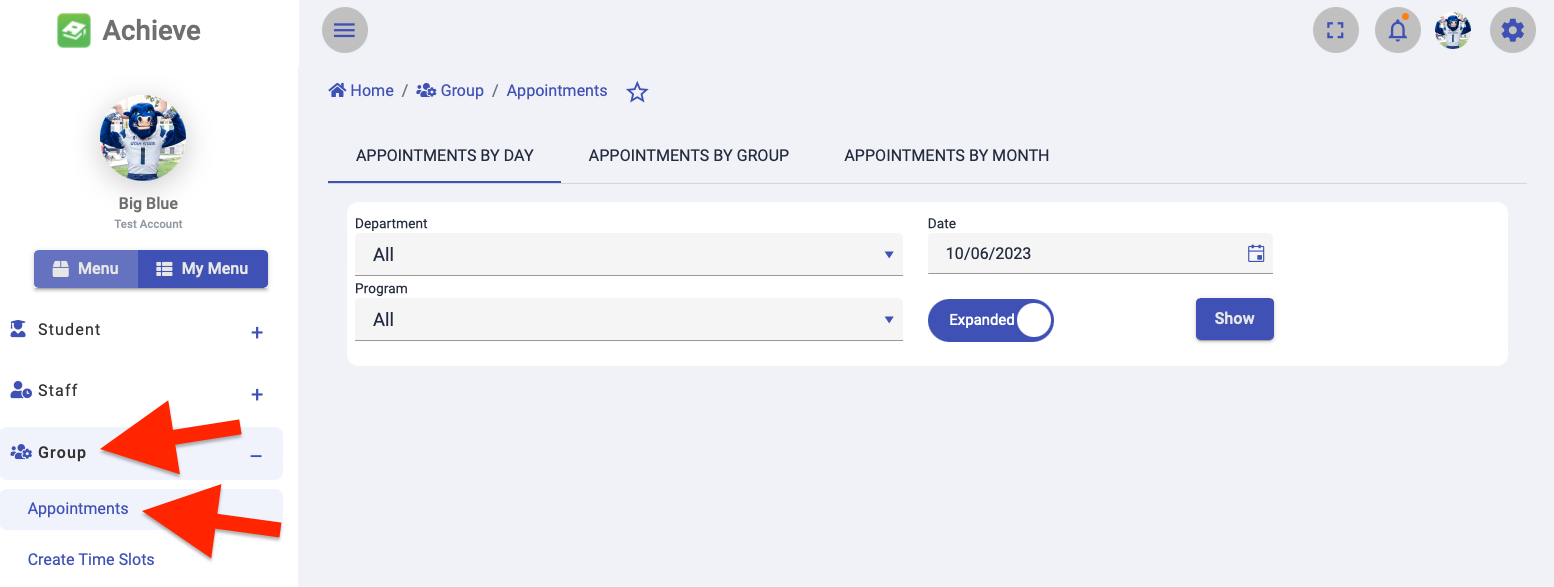
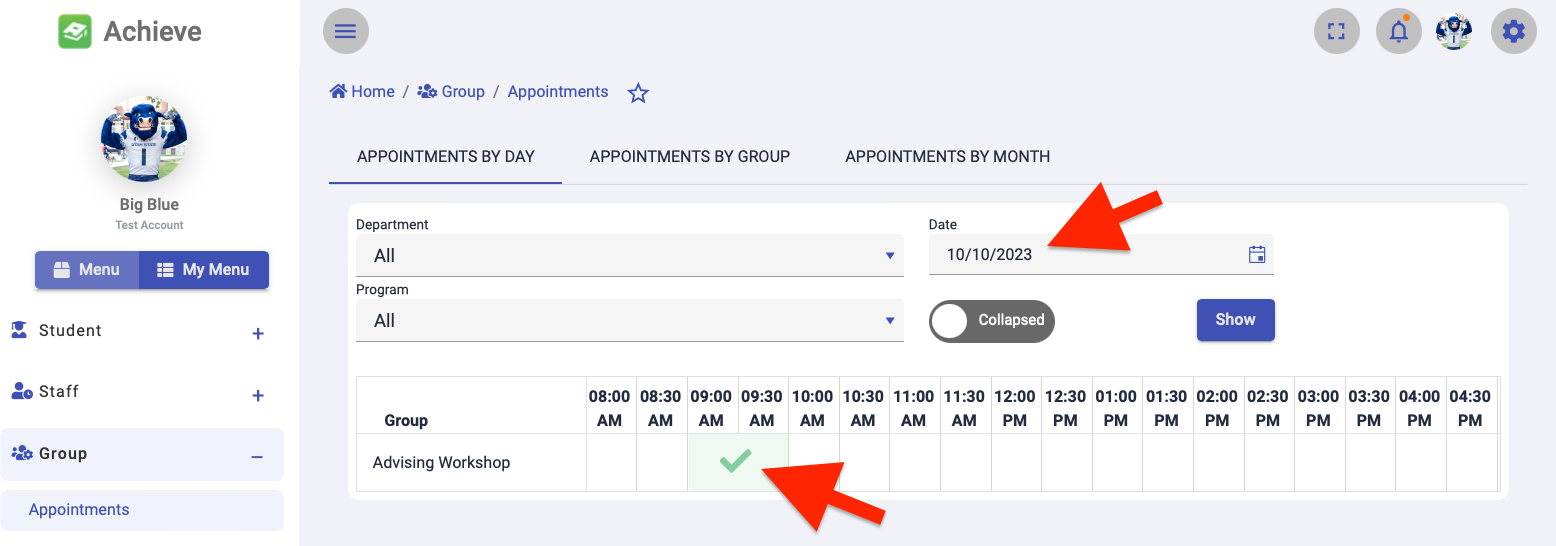
Select the group appointment
You may need to navigate to the appointment date if the appointment is not on the current date.
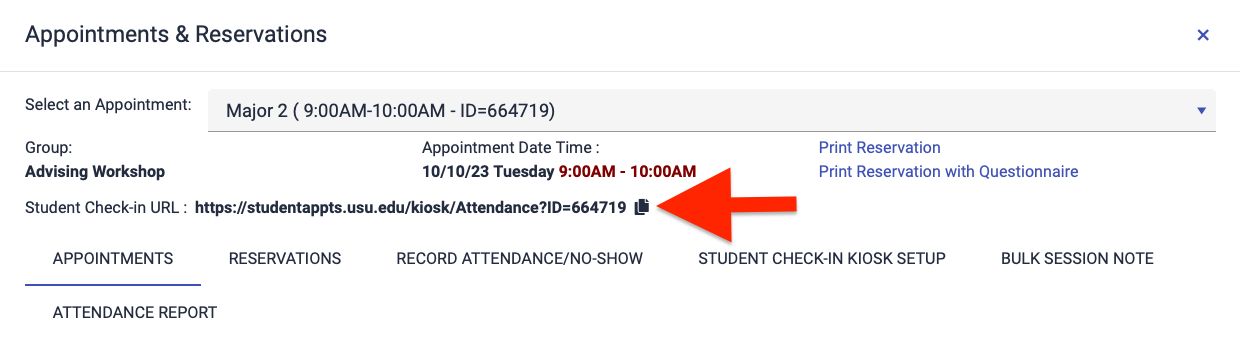
Copy the kiosk URL (Student Check-In URL) and paste it into another browser window
This will allow you to view the Welcome Screen and review your updates in the next step.
Select "Student Check-In Kiosk Setup" and configure the kiosk
- Login Option: This is the login option you'll be using to check students in when they arrive. Select Swipe Student Card.
- Refresh Time In Seconds: How often the kiosk refreshes between card swipes.
- Auto Reserve On Log-in: Select this checkbox if you want to allow students who did not pre-register to attend the event and be added to the attendee list.
- Allow Reservations After Event Start Time: Select this checkbox if you want to allow students who did not pre-register for the event to be added to the attendee list after the start of the group appointment.
- Welcome Screen Text: This is the text that is displayed on the kiosk. Customize it as needed for the event.
- Thank You Text: This is the text that is displayed after a student successfully checks in after swiping their student id card.
- Error Text: This is the text that displays if a student encounters an error when signing in with their student id card.
After making changes on this page, click the Save button
Using the Kiosk
Once a kiosk has been configured, use it to check-in students at an event by following these instructions:
Setup a PC or tablet with a USB card reader in the location you want students to check in
Open a browser window on the device and paste in the "Student Check-In URL"
Ensure the curser is always in the text box so the student ID number is inserted into the field properly when a card is swiped
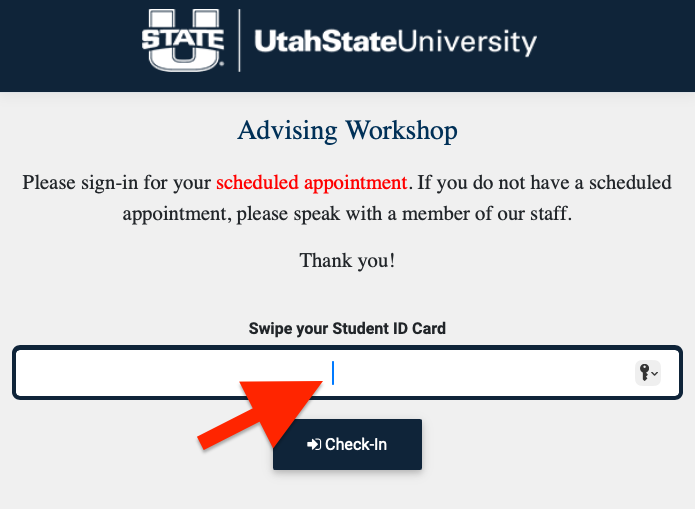
Students can now use the kiosk to check in for the group appointment using their student ID card
If a student does not have their student ID card or if they get an error when using the kiosk, check the student in manually using the instructions below.
Manual Check-In
Manually checking in a student is useful if:
- A kiosk is not being used
- A student does not have a student ID card to swipe through the kiosk
- A student gets an error when checking in on the kiosk
This section covers how to check in students who have pre-registered for the group appointment and students who have not.
Checking-In Pre-Registered Students
If a student is registered for the event, follow these instructions to check them in manually.
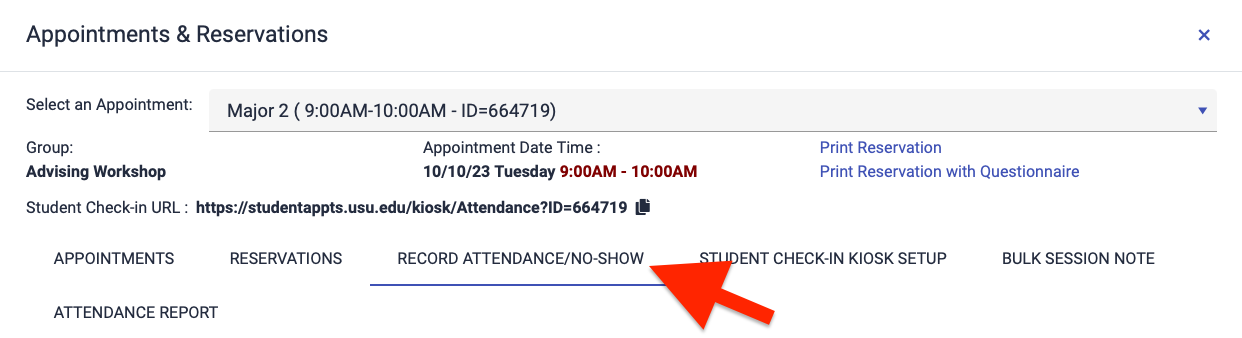
From the "Appointments" page under the "Group" tab, select the group appointment
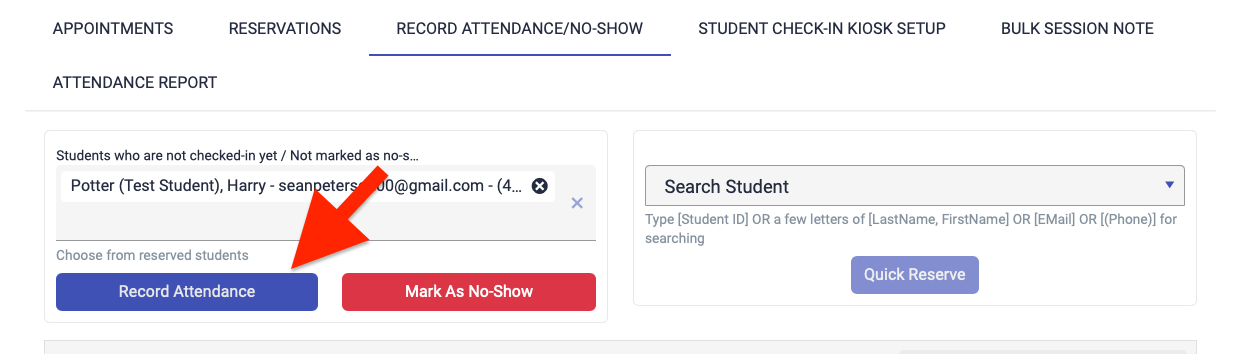
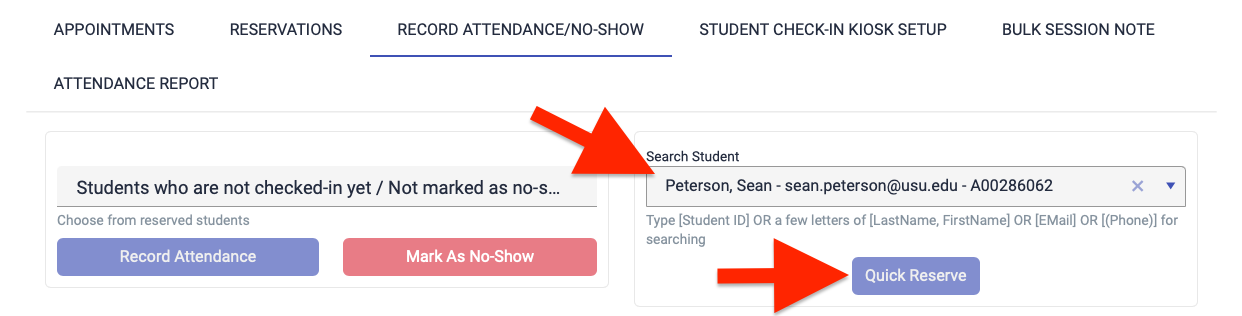
Select "Record Attendance/No-Show"
Click the dropdown and select the checkbox next to each student you wish to check in
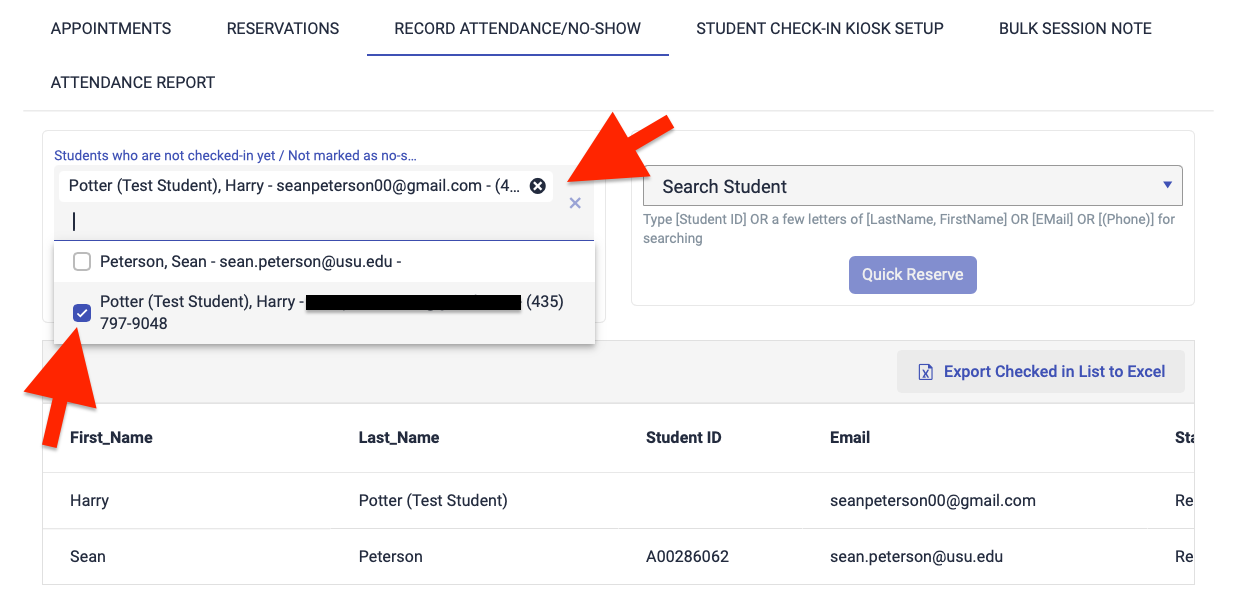
Click "Record Attendance"
Checking-In Non-Registered Students
If a student has not pre-registered for an event, follow these instructions to register and check them in:
From the "Appointments" page under the "Group" tab, select the group appointment
If the appointment start time has not passed, follow these steps:
The student will need to be added to the group appointment before they can be checked in.
- Under the Appointments tab, select Reserve.
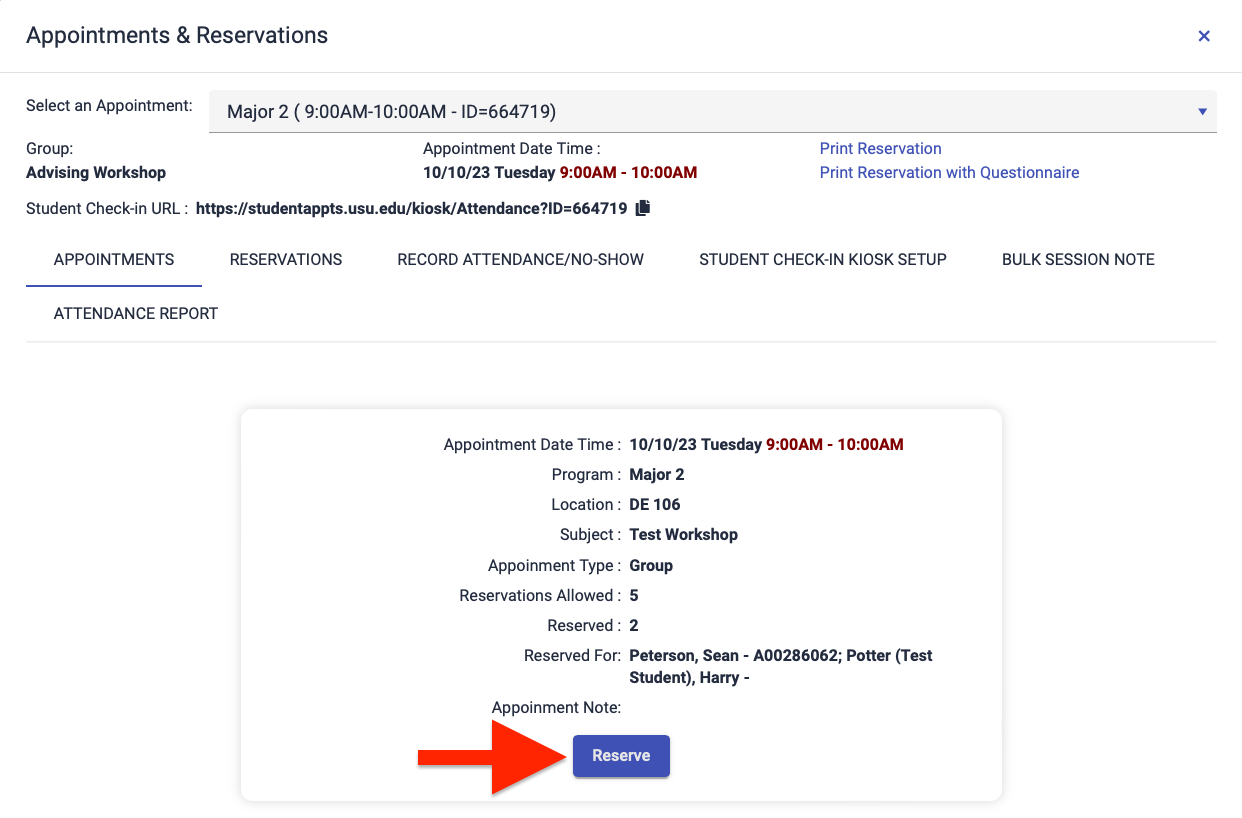
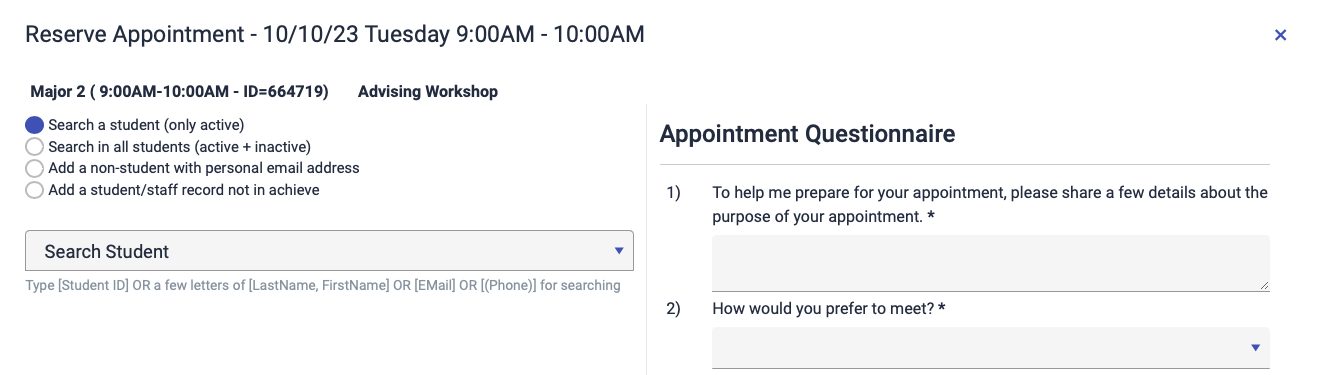
- Search for the student and answer the appointment questionnaire if used by the program. If an individual does not exist in Achieve, manually enter in their information, including their email address, first name, last name, and phone number.
- Click the Reserve button.

Once the student has been registered, they can be checked in.
If the appointment start time has passed, follow these steps:
- Click Record Attendance/No-show.
- Search for the student in the Search Student text field using their A-number, name, or email address.
- Click the Quick Reserve button.
Post Group Appointment Options
Recording No-Shows
From the "Appointments" page under the "Group" tab, select the group appointment
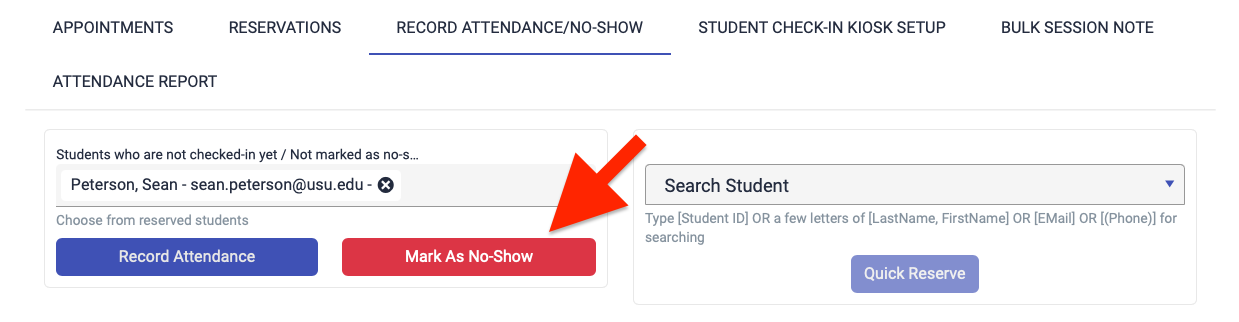
Select "Record Attendance/No-Show"
Select the student(s) name from the dropdown list who you wish to mark as a no-show
Click "Mark As No-Show"
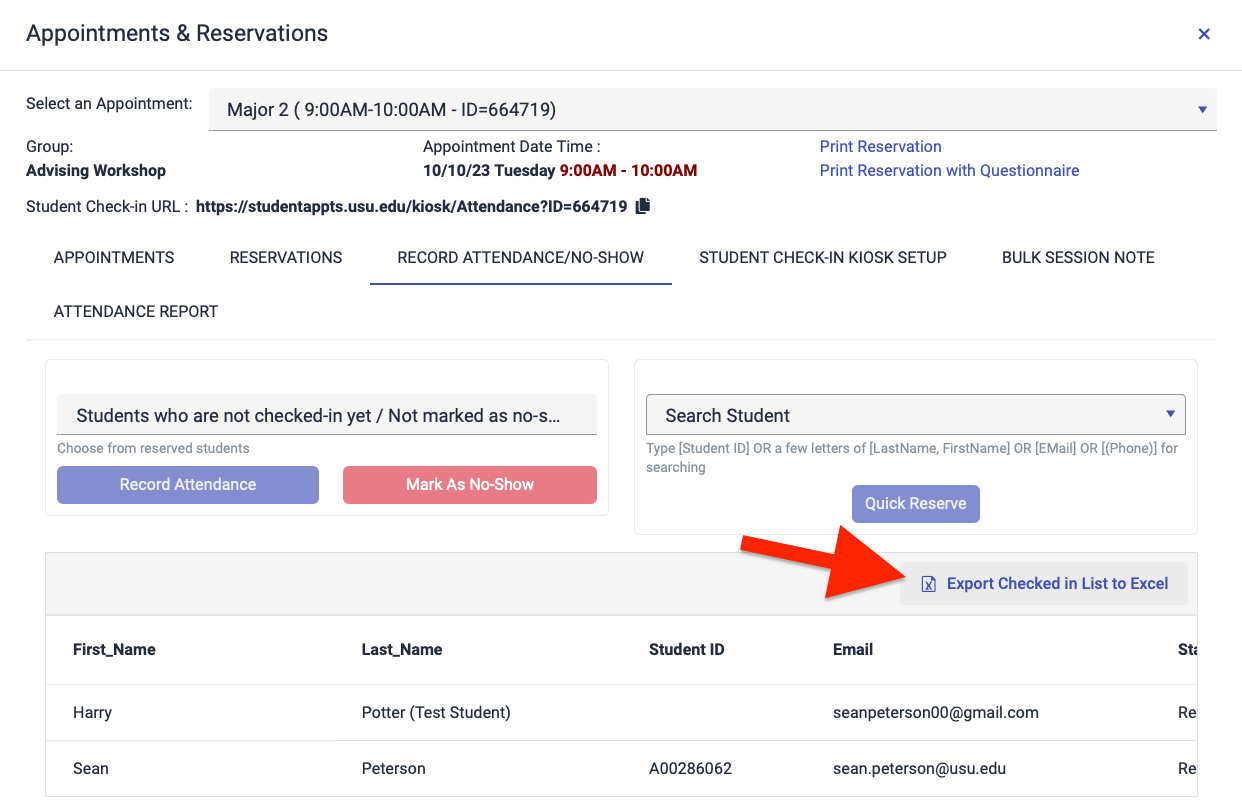
Exporting Attendance List
A complete list of students that were checked-in for the group appointment can be obtained by following these instructions:
From the "Appointments" page under the "Group" tab, select the group appointment
Select "Record Attendance/No-Show"
Click "Export Checked In List to Excel"